How to Write Tickets That Actually Meet the Definition of Ready (With Checklist)

Here’s the Definition of Not Ready (and the Checklist to Fix It)
You’ve got a sprint planning coming up. Your backlog looks fine at first glance. But let’s be honest – how many of those tickets are actually ready to build?
Here’s the brutal truth: if a ticket leads to more questions than answers during planning, it’s not ready. And no, slapping a template on it doesn’t magically make it DoR-compliant. What you need is a no-bullshit ticket checklist that brutally honest checks if you’re tickets meet the Definition of Ready – before they make it into sprint planning.
This is it.
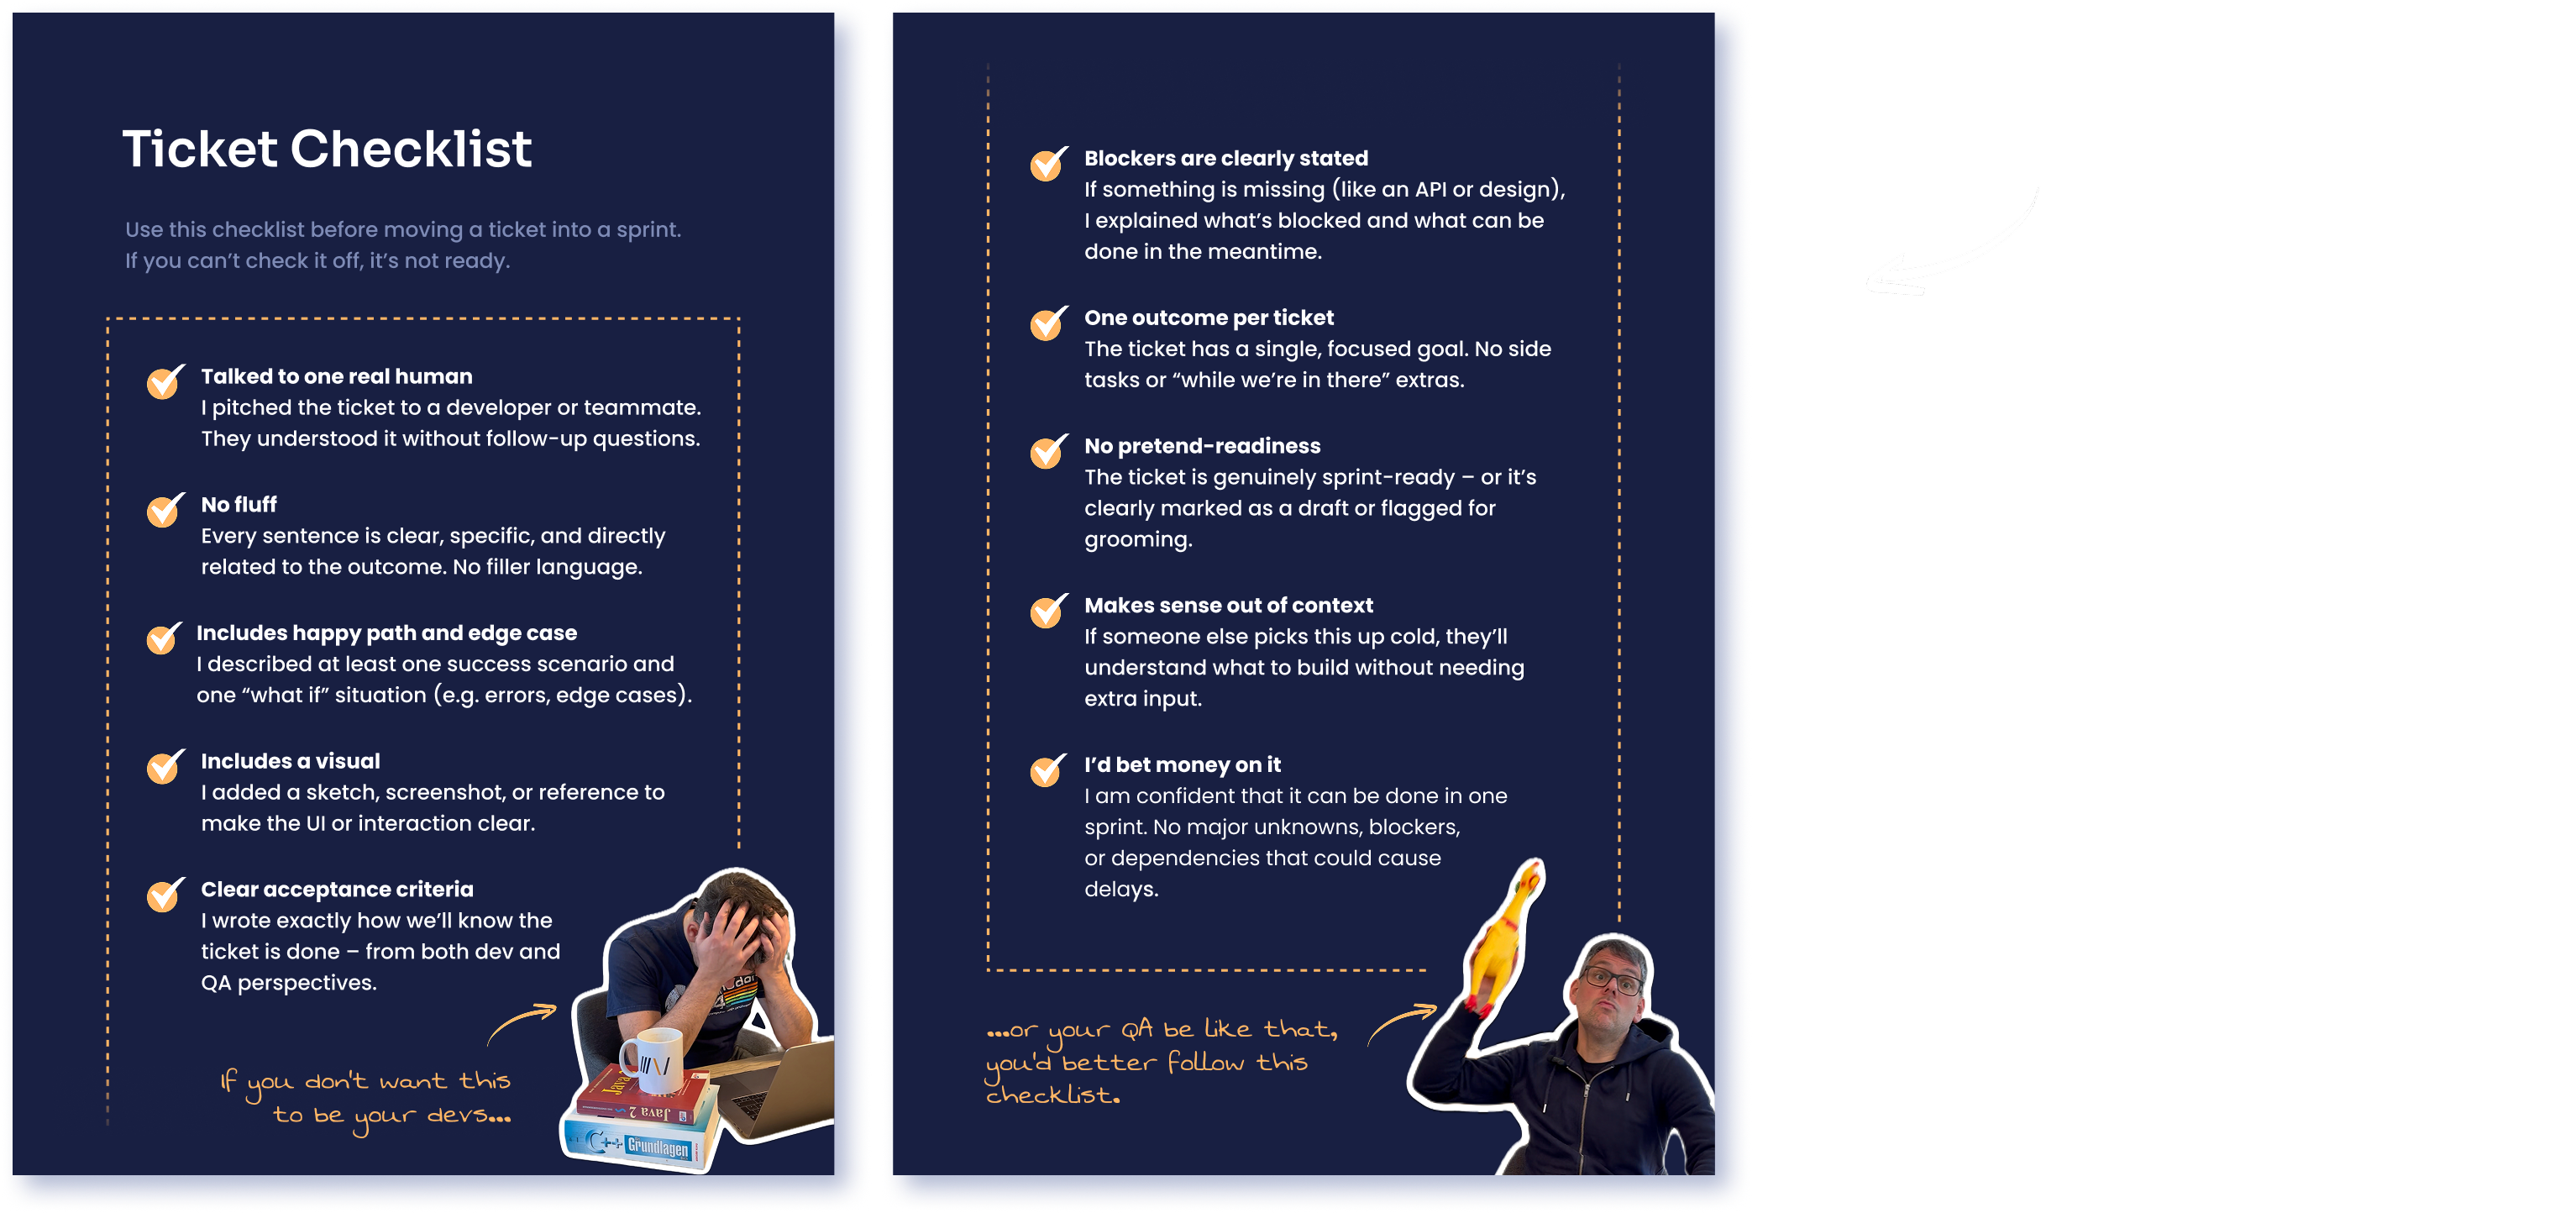
1. Talk to one real human before writing the ticket
Grabbing a dev for 2 minutes might feel like an interruption, but skipping it costs way more.
You write the ticket alone → it lands in refinement → people nod along → sprint starts → confusion → clarifications → rework → delay. You just wasted hours – across multiple people.
Instead, do a 2-minute quick pitch: “Hey, I’m writing a ticket for X. Here’s what I think it should do – would you know how to build it from that?”
If they go: “Yeah, makes sense”, you’re good.
If they go: “Wait, do we have that data yet?” or “What happens if Y?”, you just saved your sprint planning.
You’ll catch unclear assumptions, missing logic, or tech blockers before they show up mid-sprint. That one small check-in up front prevents a week of back-and-forth later.
2. Cut fluff. Every sentence must earn its place
Most tickets read like filler: “As a user, I want to be empowered to unlock value…”
No one builds off that. Rewrite it like this: “On the checkout page, users can’t remove a coupon. Add a ‘Remove’ button next to applied coupons.”
Don’t try to sound clever. Be obvious.
3. Include concrete examples (happy path + edge case)
Writing a user story or ticket isn’t just about describing a feature. It’s about making it unambiguous. You’re giving the team a job to do – and you want zero interpretation errors.
A user story without examples is a wish.
Add the happy path = the ideal scenario. This is what should happen if everything works exactly as planned. Think of it as the sunshine route.
Example: “If the user enters correct email and password, redirect them to the dashboard.”
It tells the dev exactly what to expect when things go right. No guessing.
Now add at least one edge case. That is the “what if?” scenario, where things break, behave unexpectedly, or require fallback logic. These are the weird inputs, system failures, or missing data cases that devs always ask about after you thought your ticket was done.
- What if the password is wrong?
- What if the user hasn’t confirmed their email?
- What if the backend is down?
If you don’t define edge cases, you’ll get five follow-up questions. Maybe more. Here’s how to make the example ticket airtight:
- If login is successful, redirect to dashboard
- If password is incorrect, show error: “Password is incorrect.”
- If email isn’t confirmed, show banner: “Please confirm your email to continue.”
- If login API returns 500, show: “Service temporarily unavailable.”
You’re not just making it easier for devs – you’re also making QA’s job easier. They’ll literally test these paths, one by one. And if it breaks later, nobody’s guessing what “should have” happened. The rule is: If your ticket only describes the perfect flow, it’s not ready. Always include the “what if” path.

4. Add UX/UI references – even if it’s just a sketch
Tickets with no visuals = guaranteed back-and-forth. It doesn’t have to be Figma-perfect. Even a screenshot with red arrows is better than words alone.
Why? Because what you mean by “add a banner” or “show a button” might look totally different in someone else’s head. A visual just makes sure everyone’s thinking about the same thing.
5. Write acceptance criteria like a QA
Acceptance criteria just means: how do we know this thing works when it’s done? Don’t write something vague like: “Undo should work properly.” That could mean ten different things.
Instead, be specific: “When I click ‘Undo’, the last text edit is undone.” It’s like writing down the test before anyone starts coding. It helps the dev know exactly what to build – and helps QA know exactly what to check. Everyone’s on the same page.
6. Kill dependencies or clearly spell them out
Sometimes a ticket depends on something else, like an API that isn’t ready yet. That’s normal. But if you just write “Blocked by backend” and leave it at that, the ticket will just sit there.
Be specific. Say exactly what’s missing and what the dev can still do.
Example: “This needs the GET /user/settings API from ticket #342. If that’s not done yet, just build the UI and show a loading spinner.”
Now the dev knows what to wait for – and what they can already start on.
7. Do one thing per ticket
Each ticket should have one clear goal. If you find yourself writing things like “First we update the form, and then also fix the validation, and maybe also tweak the layout…” – stop. That’s more than one task.
Split it.
Why? Because when a ticket tries to do too much, it’s harder to estimate, harder to test, and more likely to get delayed or half-done. It’s also way easier to forget something.
One outcome = one ticket. If something feels like a “quick extra while we’re in there,” it’s probably the start of scope creep. Keep it focused.
8. If it’s not sprint-ready, don’t pretend it is
Mark it as a draft. Don’t try to sneak a half-baked idea into a sprint and hope for the best. Instead, be honest: mark it as a draft, add a comment, or use a label like “needs grooming” or “missing backend”. And be loud about it!
That way, everyone knows it still needs work. You avoid wasting time during the sprint trying to figure things out last minute – and your team knows they can trust what is in the sprint to be truly ready.
9. Read it as if you’re the dev seeing it for the first time
Once you’ve written the ticket, step away for a bit. Then come back and read it like you’ve never seen it before. Pretend you’re the dev picking this up in the sprint, with no extra context.
If you find yourself thinking, “Wait, what exactly am I supposed to do here?”, the ticket isn’t ready yet. Rewrite it until even your intern would understand the goal – without having to ask questions.
10. Final check: Would you bet money this can be done in one sprint?
Before you call a ticket ready, ask yourself one last thing: Would I actually bet money that the team can finish this in the next sprint?
If the answer is “How much?” or “depends if the backend is ready” or “once the design is final” – then it’s not ready.
Unclear dependencies, open questions, or unfinished designs are red flags. They slow everything down once the sprint starts. Better to pause now, fix what’s missing, and avoid wasting a week trying to make it work mid-flight.
A ready ticket should feel boring in the best way. Clear goal, no surprises. If it doesn’t? Push it back.

Sounds like a lot? It is.
Let’s be real: writing good tickets like this takes discipline. And time.
The kind of time you usually don’t have when you’re juggling a huge backlog, bug reports, stakeholder updates and the next feature deadline.
Your team might not have time to answer your ticket draft questions.
You might not have time to think through every edge case, break things into smaller pieces, or double-check if the ticket’s really sprint-ready.
Neither do we. That’s why we built Product Copilot, an AI assistant that helps product teams to write better tickets directly in your ticket system.
Here’s how Product Copilot helps
1. It’s like a smart, detail-obsessed dev sitting next to you
As you’re writing a ticket, Product Copilot reviews it in real time and asks the kinds of questions a good developer would. Missing a loading state? Forgot to define what happens when something fails? It’ll point it out – before the ticket makes it to the refinement meeting.
It’s not about making you feel bad – it’s about helping you catch the stuff you’d normally miss when you’re in a rush.
2. It helps you handle the extra steps
Following a checklist like this often means extra work: splitting big tickets, writing edge cases, cleaning up vague acceptance criteria. Product Copilot makes that easy.
Got a ticket that’s too big? Just write: “Split this into 3 smaller tickets with clear goals.” Done. You’ve got clean, scoped tickets in seconds.
3. It writes full, clean tickets – including happy path and edge cases
Whether you’re drafting something from scratch or fixing a messy ticket, Product Copilot helps you describe what should happen – and what might go wrong. It gives you suggestions for both the happy path and the “what if?” cases, so you’re never stuck staring at a blank description again. Product Owners who use Product Copilot say their developers are noticeably happier with the tickets – and refinement sessions can finally focus on the important stuff, not filling in missing pieces.
Try it yourself: Free trial available
If you want your tickets to actually meet your Definition of Ready without adding hours of extra work, Product Copilot has your back. Product Copilot turns this ticket checklist into real working habits. It’s available as a free trial – so you can see for yourself if it actually makes your life easier.
